Cheesy Sausage and Potato Pie

150315_0009At some point last month or the month before, one of the grocery stores I frequent had Johnsville ground Italian sausage on sale, so I decided that I wanted to try making something new. Did you know that the Johnsonville website has a bunch of great recipes?

I decided that I wanted to try this wonderful-looking savory pie.

Sometimes the bonus result of new recipes, a bonus for me at least, is the fact that I get to buy new cooking supplies! In this case, I needed a pie pan. I also got to work Pillsbury’s refrigerated pie crust for the first time.

This recipe is very easy, but the fact that it has to be baked for an hour means that I don’t consider it a good choice for a week night meal.

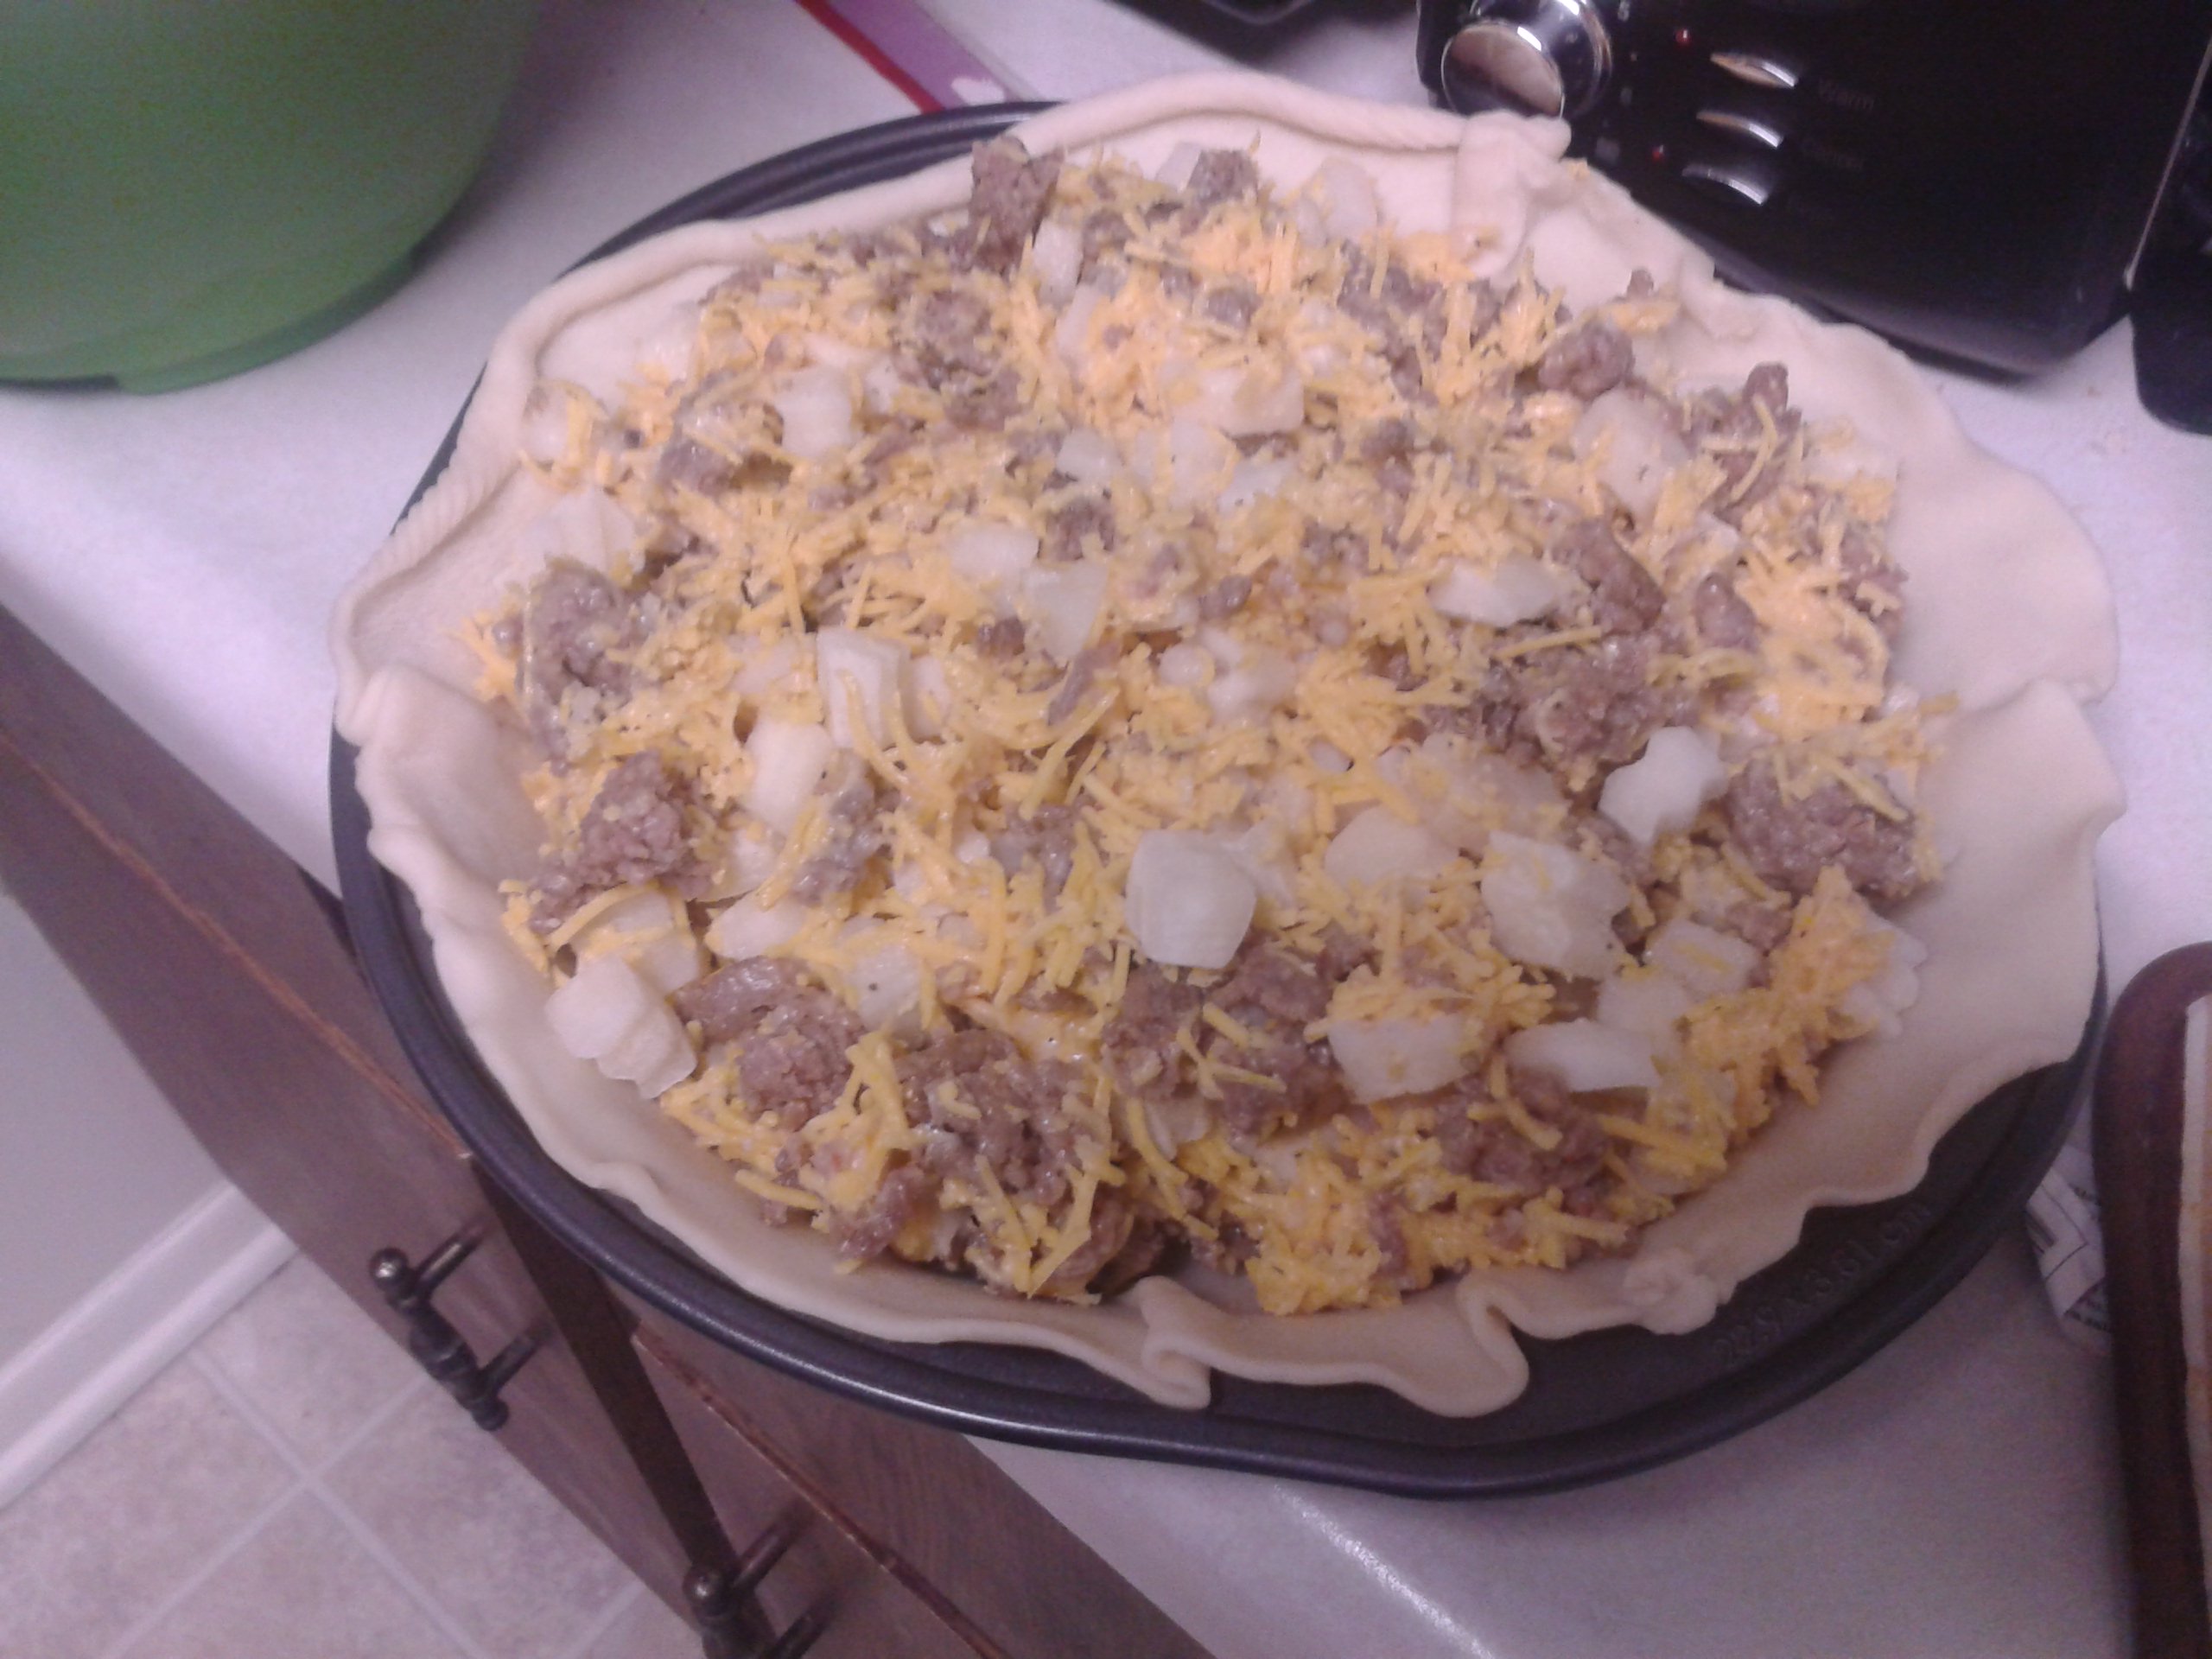
After lining the bottom of your pie pan with one pie crust and trimming the edges, you fill it with ground Italian sausage, frozen potatoes, shredded cheese, cream of potato soup, and some spices. Then, you carefully layer the other crust on top and trim it. Make sure to cut some slits into the top so that your pie doesn’t explode in the oven!

I used some onion powder in place of actual onion and accidently used a smaller can of soup than was called for. Otherwise, I stuck to their recipe.

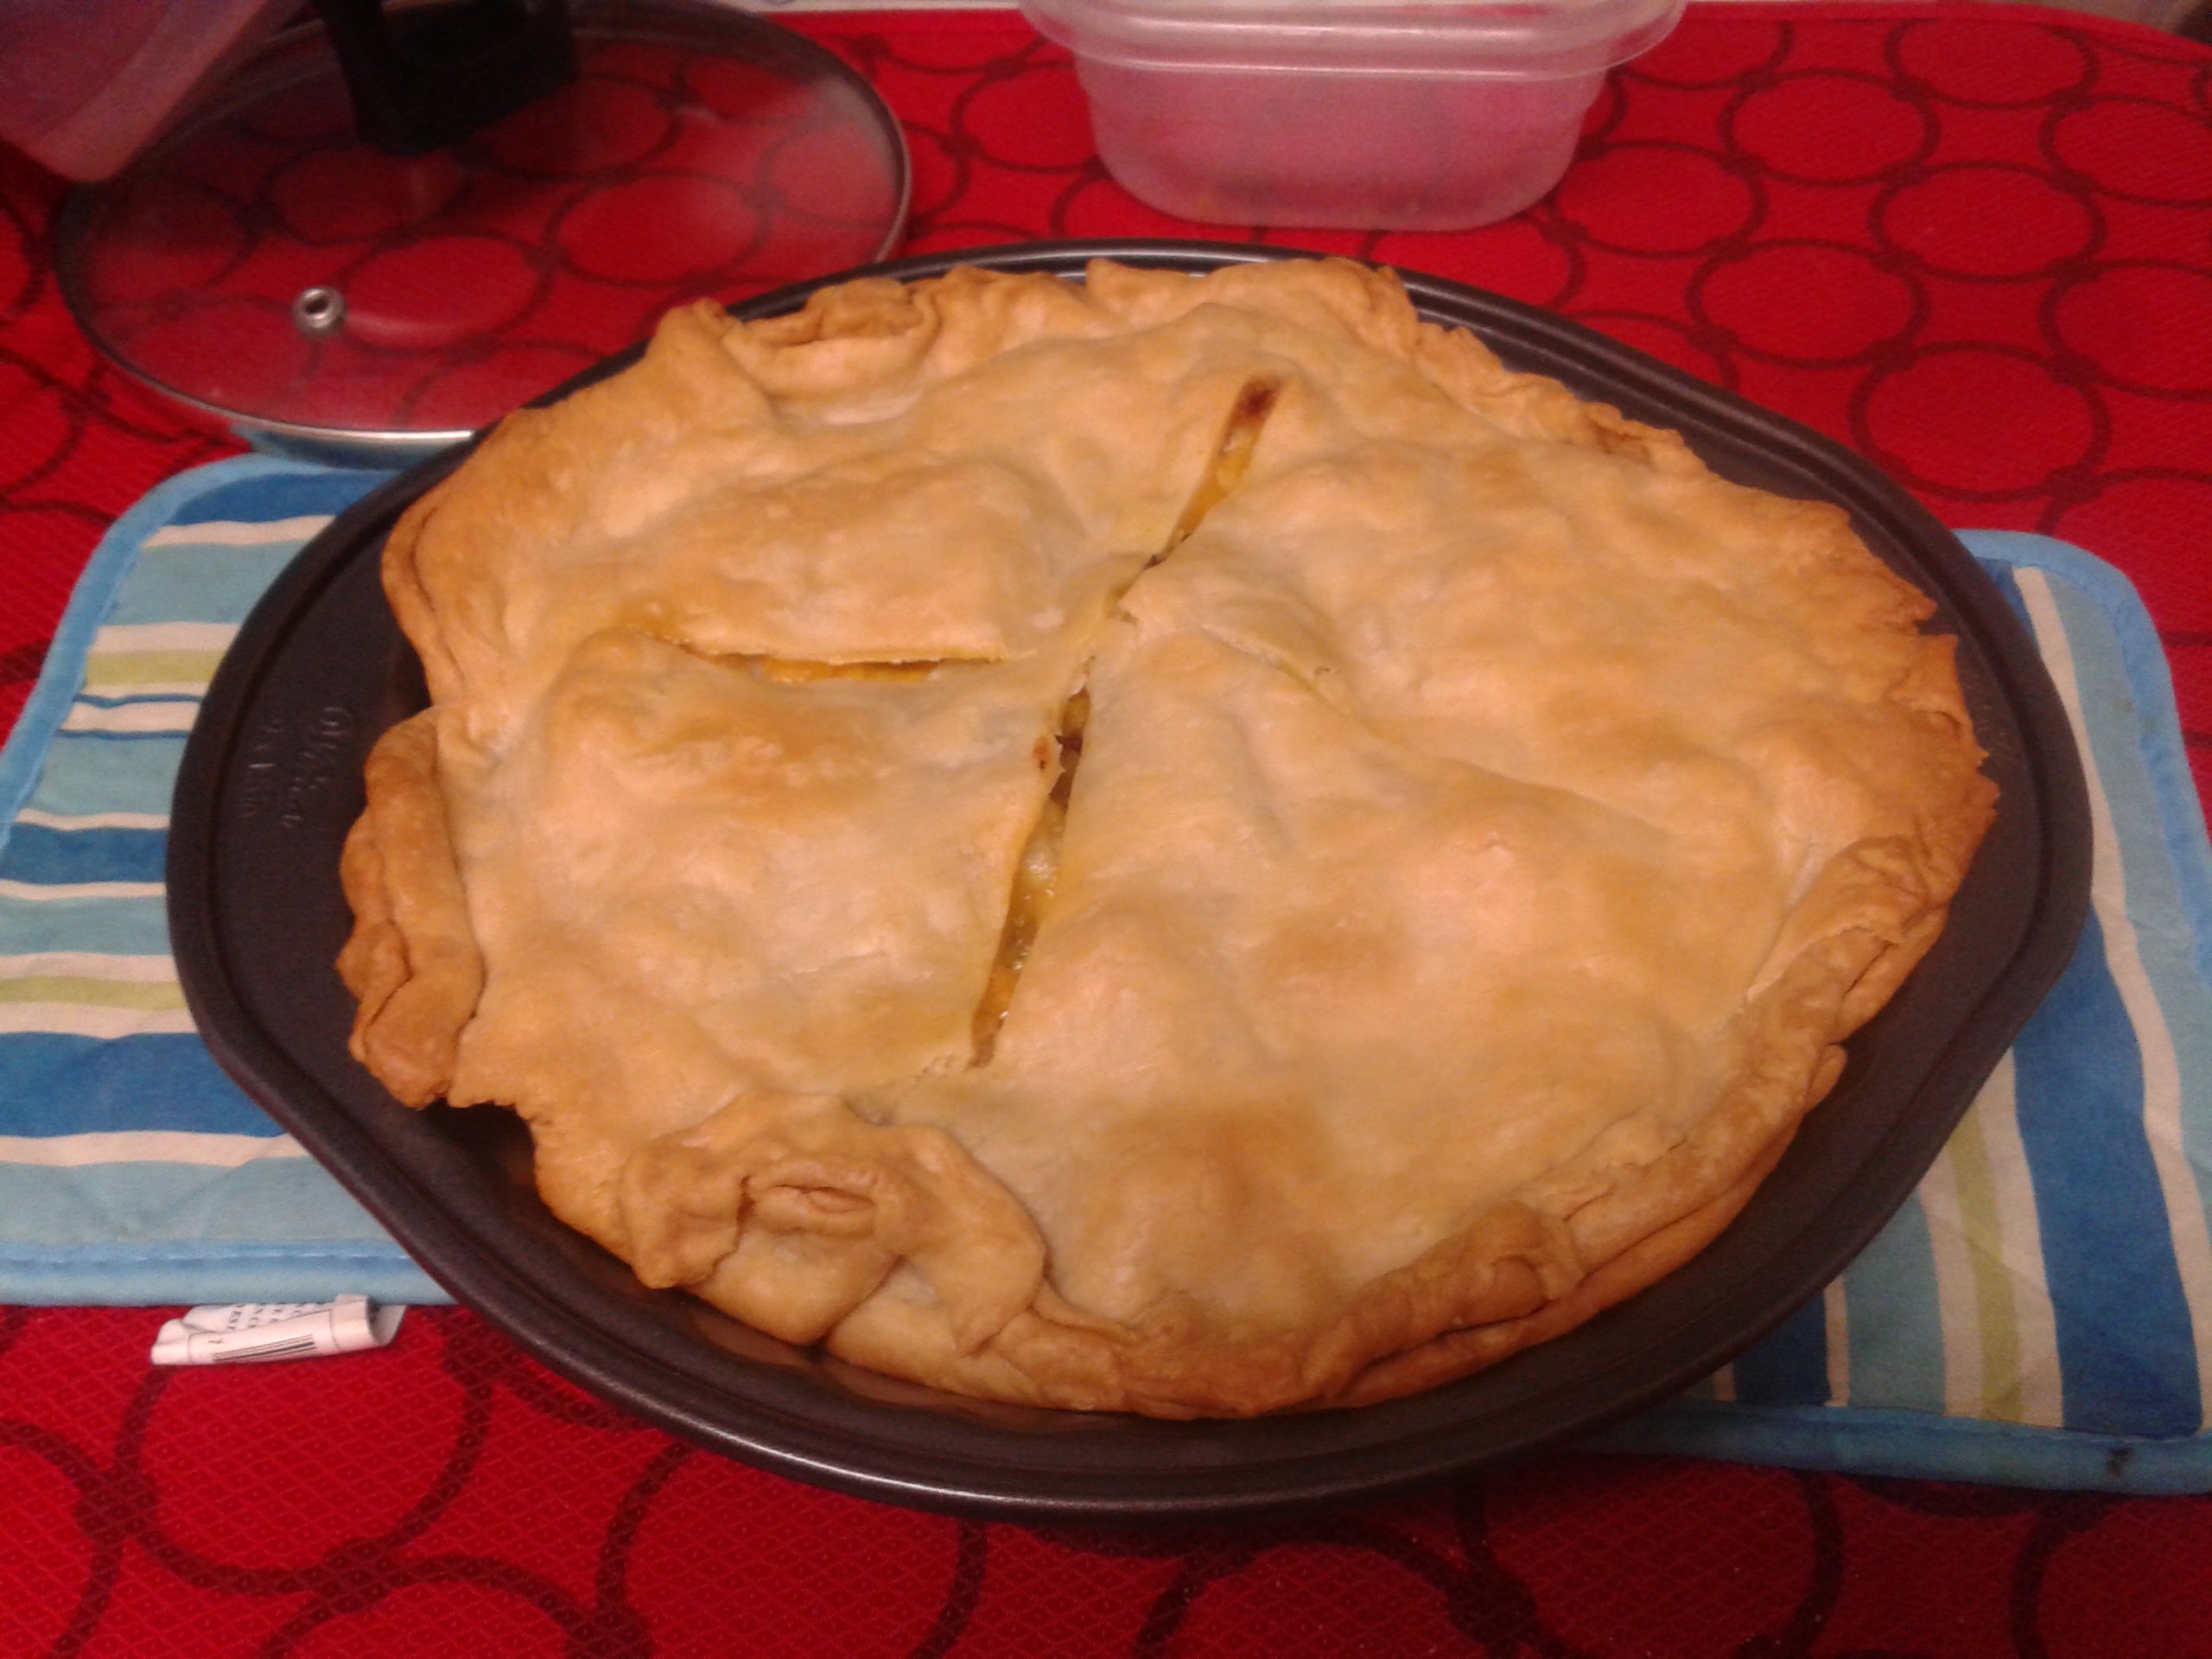
Kevin and I both really enjoyed this. Not only was it tasty, but it was filling and huge, which meant we had the rare occurrence of leftovers. This pie is dense with plenty of sausage and potato goodness to each bite and a creaminess from the cheese and soup to tie it all in. Using a bigger can of soup might have added to the texture, but we didn’t really miss it.

The crust was great too. It was really easy to use and cooked up crunchy yet tender. I’d like to make a sweet pie with it at some point.

150315_0007Cheesy Sausage and Potato Pie

Ingredients

  • 1 pound ground Italian sausage (I used mild)
  • 2 cups frozen, diced potatoes
  • 1 cup green onion, sliced (or 1/2 tbs onion powder)
  • 1 10.75 ounce can of cream of potato soup
  • 2 cups shredded cheddar cheese
  • 1/4 tsp pepper
  • 1/4 tsp ground sage
  • 2 pie crusts, 9 inches

Directions

  1. Preheat oven to 350 degrees.
  2. Brown and drain sausage.
  3. Mix all of the ingredients for your filling.
  4. Place on pie shell inside of pie pan, pressing against sides and bottom. Trim off excess.
  5. Add filling mixture and then place second crust on top. Trim off excess.
  6. Press edges with a fork to seal and cut slits on top of the pie.
  7. Bake for 1 hour and let stand 15 minutes before baking.

Pillsbury Pizza Crust

A while ago, one of my friends at work told me about Pillsbury’s pizza crust, so I had to try it. Their pizza crusts can be found with their biscuits and crescent rolls and comes in Artisan, Classic, and Thin. I went with classic.

Besides my can of dough (and one extra in case it didn’t make enough food), I bought some mozzarella cheese, pepperoni, and pizza sauce. We own a pizza pan, but I decided to use a cookie sheet and make a rectangular pizza instead.

The dough came out of the can easily and spread out with minimal stretching. It did tear a little bit but I was able to push the dough back together.

Then, per the directions, I prebaked the dough. When it came out, I put some sauce and cheese on it and then had Kevin cover it in pepperoni. Then it made a return trip to the oven.

150223_0001

As you can see in the above picture, some of the outer edges got a little overdone. But the center pieces were lovely!

The dough was soft and chewy with a slightly sweet taste that complimented our chosen toppings. Look at that army of pepperoni…

Pillsbury has some awesome products and this is one that I would highly recommend! Just make sure that you watch it while it bakes, especially towards the end–you want a golden brown crust. Not a dark brown, rather crunchy crust. I think I’ll make some mini pizzas with the brownie pan that my mom got me with the other can that I have.


Butter Chicken

In my mission to eat healthier, I’m trying to have my husband and I eat more meals at home, which pretty much means that I’ll be cooking. He doesn’t cook. I don’t know about you, but when I get home from work, I don’t feel like making something that will take a ton of effort.

Indian_Butter_ChickenIf you share in this thought process, you’ll love Passage Food’s Butter Chicken Simmer Sauce packet because it is super easy.

In 2013, Mom took me to Disney world to celebrate my graduation from college. On this trip, we discovered one of my most favorite Disney restaurants–Sanaa. This restaurant is at Disney’s Animal Kingdom Lodge, which means that you get to see some pretty amazing animals outside the windows while eating your meal. The food is a mixture of African and Indian inspired cuisine with everything from Tandoori Lamb to a Grilled New York Stip steak. There’s something for everyone here.

Besides starting out with the Indian-Style Bread Service–which is phenomenal, by the way–we both picked the Slow-Cooked in Gravy, Simple and Well-seasoned-Dinner. You get to pick from two different rices and a variety of meats. We both had the basmati rice, butter chicken, and something else. I can’t remember what the other meat was, but I’m pretty sure Mom got the beef short ribs and I got some sort of fish. But when Kevin and I went on our honeymoon last year, we both picked double doses of butter chicken. Mom and I had raved about it so much that he had decided to get whatever I was having.

The butter chicken at Sanaa is made of tender cooked chicken in a pool melt in your mouth delicious sauce. I have cravings for this stuff! In the picture below, from the left, is butter chicken, basmati rice, and some sort of shrimp. (If you follow the link attached to the picture, you can learn about dining with an animal specialist.

Dine with an Animal Specialist - January 2013 at Sanaa - 15

So, when I saw Passage Food’s packet of butter chicken wonderfulness at Meijers, I had to try it. As you can probably tell, I have some high standards for butter chicken. And this packet did not disappoint.

While it isn’t exactly the same thing that you can find at Sanaa, I didn’t expect it to. I don’t have fairy dust in my kitchen. Or it could be that I don’t add the optional cream…either way, it’s delicious!

All you do is chop up about a pound of chicken and then sear it in a pan with some olive oil before pouring the beautiful sauce all over it and stirring it to make sure the chicken is all coated. Then, cover the pan and let the chicken cook all the way.

We enjoy our chicken with jasmine rice brought to you by Success Boil-in-Bag. It’s super easy because you cook it in the microwave and it’s a great way to absorb all that wonderful sauce.

This is also something that my husband enjoys. We’ve actually had it two weeks in a row now and he asked me to get lots of chicken and butter sauce packets when I asked him what kind of groceries he wanted this week. Remember how I said you use a pound of chicken? Well, I also make two bags of jasmine rice (there’s probably two-three servings in each bag). When dinner is ready, I get some rice and then put some chicken and an ample portion of sauce on top of it. Then, Kevin puts the rest of the rice in a bigger bowl before dumping what’s left of the chicken and sauce on top of that.

We don’t usually have leftovers in our home. But we certainly have full bellies!

If you’re looking for a quick, delicious meal, I highly suggest that you add this to your to-make list.

Super Easy Peanut Butter Cookies

First of all, Happy New Year’s Eve! I can’t believe that the year has gone by so quickly.

Tonight, my husband and I may or may not be going to a party. This is dependent on whether or not the party planner moves the party again. Just in case, I decided to make something last night to bring with us. I got home at about 8:30 pm, so I wanted something quick and simple that I could do before bed.

reeses-peanut-butter-cup-cookies-005So I thought I’d do something with the 30 oz roll of Pillsbury peanut butter cookie dough that I had in my refrigerator. I remember making and having Peanut Butter Blossoms in the past, but I don’t have any Hershey’s Kisses in my apartment.

I do, however, have a bag of mini Reese’s cups and a mini muffin pan. I like mini things.

I’ve seen these before, but I wanted to make sure that I made them correctly, so I did a Google search and found a recipe for them on food.com.

Stormy’s Recipe shared by Karen=^..^=

Ingredients

  • 18-24 mini Reese’s cups
  • 1 (18 ounce) package of refrigerated peanut butter (or any variety of cookie really) cookie dough

Directions

  1. Place unwrapped peanut butter cups in freezer before starting. Note: this step didn’t happen for me until after my cookies were in the oven, so they had less time to be cold. I would suggest you actually do this step to help with the process.
  2. Preheat oven to 350 degrees.
  3. Using a miniature muffin tin, place a 1 inch ball of dough in each cup. Note: since I had the big package of cookie dough, I cut it in half. Then, I made a bunch of slices out of the half, cut those halves into fourths, and then simply plopped each fourth in a muffin cup.
  4. Bake for 5 minutes less than what the package directions say. (This usually turns out to be 7-8 minutes)
  5. Remove from oven and leave in the pan.
  6. Remove candy from freezer and carefully press one into each cookie. Note: I made half of these with a cluster of chocolate chips in the middle instead of peanut butter cups because my husband didn’t like the idea of the later.
  7. Remove from tins after they are almost cool and then place on racks to cool completely. Note: it apparently takes longer than the time I waited to scoop them out of the cups. I used a spoon to do so and wound up with at least a few that I had to immediately throw in my mouth to avoid a mess. I did not mind throwing cookies in my mouth.

I am planning on making these again, probably in the near future considering the fact that I have half a package of peanut butter dough waiting for me in the refrigerator. I also have these cookies on a plate and covered in foil in the fridge because when my bedtime rolled around (10 pm), I didn’t feel like sitting up even longer to wait for the chocolate to finish setting.

These cookies are filled with the savory, sweet goodness of peanut butter with a core of rich chocolate and a bunch of added peanut butter. And this recipe is such a great vessel for so many other things. I’m picturing using a variety of different refrigerated cookie dough and candy combinations.

Is this something that you’ve played around with before?

Martha White Muffin MIx

Last night, I decided that I wanted to make little muffins with my mini muffin pan that I finally bought myself. Said pan is Wilton’s brand, which I really like. I usually buy it when I find it on sale, which is how I got this particular pan.

I’ve been picking up random baking mixes sometimes while grocery shopping, which is bad considering my little kitchen, which feels a lot like the mini muffin version of kitchens. But this did mean that I had a pack of Martha White’s banana nut muffin mix on hand for my baking endeavor of the evening.

Honestly, I picked this particular brand because it cost less than a dollar, so I figured that it wouldn’t hurt to try it.

Making these muffins is also really easy—all it required was a half cup of milk and some stirring. The back of the bag even had instructions specific to mini muffin pans, though said instructions seemed exactly the same. The cook time they gave was 10-12 minutes, so I set my timer for 10 minutes.

My kitchen quickly started smelling tasty, but just as quickly turned to smelling not so tasty in the last couple of minutes.

That should’ve been my sign to take the muffins out of the oven early.

Thankfully, the slightly burnt muffins slide very easily from the pan. Whether this was do to the pan, the mix, or the cooking spray I used on the, I don’t know but something worked.

Sadly, the muffins don’t have a lot of flavor to them. I’m not sure if this is because they should have been baked for something like 7-8 minutes instead of 10 or if it’s due to the muffin mix itself.

I will be trying this again because I want to see how these muffins taste when cooked properly.

Thanksgiving Leftovers

image

Unlike the vast majority of Americans, I didn’t make a turkey or even the typical feast on Thanksgiving. Instead, I prepared a little precooked ham, some homemade mashed potatoes, frozen bread sticks, and a little can of creamed corn.

It wasn’t anything fancy, but it was good.

Cooking Note: When heating up a precooked ham, put in a baking dish with about a half cup of water and cover with foil. Then put it in the oven for around 30 minutes. I put mine in for 20 minutes and it was lukewarm to cold by the time we sat down to eat it.

But we also wound up with a lot of leftover ham. Ham for days isn’t a bad thing because, well, I like ham and I like eating leftovers; having leftovers is one of my favorite parts of Thanksgiving. My husband, on the other hand, doesn’t eat a lot of leftovers.

This brought me to the dilemma of how to make ham and potatoes more appealing for him so that all of it would get eaten.

Yesterday, I remembered that I had bought a two pack of Pillsbury Crescent Rolls. I also remembered that it seems like there’s a very real possibility that everything tastes good when stuffed in a crescent roll.

Except, perhaps, things like gummy bears.

So, when I got home, I told my husband that I was planning on putting cheese and ham in some crescent rolls.

In response, he said, “what about the potatoes?”

Hmmm…what about the potatoes, indeed?

After popping open one container of roll dough, I decided to leave them in twos. Two crescent rolls left attached = one square/rectangle that is easier to stuff.

When doing this, try to make sure that you press the seams together to try to prevent food from escaping while it’s baking.

After setting the oven to preheat at 375 degrees, I filled each with two small spoonfuls of mashed potatoes, which I sprinkled with salt and pepper; a pinch of mild cheddar cheese; and ripped up pieces of ham.

I put these on a baking sheet lined with Reynolds Parchment Paper and then baked them for what wound up being a total of 12 minutes.

These were super tasty, but still a little doughy. So, in the future, I think I’ll bake them for 15 minutes instead. Also, I think it would be good to mix up chopped up ham and shredded cheese into the mashed potatoes to use to stuff the rolls instead of just layering them like I did.

Recipe

Ingredients

  • 1 package of Pillsbury Crescent Rolls
  • Precooked ham; I didn’t have the honey variety
  • Shredded cheese; I used mild cheddar
  • Already prepared mashed potatoes
  • Salt & pepper, to taste

Directions

  1. Preheat oven to 375 degrees
  2. Line baking sheet with parchment paper and use as your work surface. Once you’ve opened the crescent rolls you’ll find that 2 rolls together create a square/rectangle. Spread these out and pinch the seams that connect the two together
  3. In a bowl, gently mix together the rest of the ingredients
  4. Using a spoon place portions of your filling into the middle of your squares of crescent dough. Then, fold the ends of the dough together and over the filling so that there aren’t any openings
  5. Bake for about 15 minutes depending on your oven

Cooking Note: As you can tell, I didn’t really measure anything when I made this the other day. Use however much and whatever type of ham and cheese and potatoes you want. Also, one pack of crescent rolls yields 4 pockets of ham goodness.

The next time that I make these, I don’t think I’m going to use potatoes. I’m going to see what happens with just ham and cheese.

Banquet Morning Bakes

Breakfast is my favorite type of food. If I could, that’s probably all I’d eat some days—eggs, bacon, hash browns, pancakes, etc. But I usually don’t have the time or energy to do more than pour myself a bowl of cereal in the mornings.

Then one day, my mom pointed out something called Banquet Morning Bakes while we were getting groceries. They sounded and looked wonderful, so I had to try one.

Not only did they look tasty, but they looked super easy to make. All you need to add is water.

First, I tried the Cheesy Ham and Hash Browns. I thought it would be hard to mess up something as easy as hash browns with ham and cheese. But the flavor fell flat for me with this one. It also made me sick to my stomach. Take that lightly though, I have some serious belly issues that I’m going to have checked out by a doctor next month.

Anyways, after that debacle, I was leery of trying the other two flavors. If it wasn’t for my love of biscuits and gravy and a friend of mine telling me how good it was, this box of goodness wouldn’t have found its way into my shopping cart.

While this one does require a tad more work than the other one, it’s still super easy and only requires water. While preheating the oven, you mix 1/2 cup of water with the biscuit mix. Then, you pour the can of gravy in your pan. Finally, you put spoonfuls of your biscuit dough on top of the gravy before putting it in the oven.

Naturally, mine didn’t look anything like the pretty biscuits Banquet was able to make on the box. But this is probably because I just threw lumps of dough on top instead of trying to make even biscuit shapes.

After thirty minutes, I had a delicious looking pan of bubbling gravy topped with golden biscuit blobs.

And…it actually was delicious! In fact, I went back for seconds. The biscuits were thick with that perfect fluffy inside and crunchy crust, and the sausage gravy had a great flavor to it.

My only complaint is the biscuit to gravy ratio. I like a lot of whatever can be considered sauce in meal (so, in this case, the gravy). I think, the next time I make it, I’m going to buy an extra can of gravy to add to my pan of deliciousness.

It’s highly doubtful that I’ll try the ham and hash browns again, but I might just have to try the Biscuits and Chicken version after having had this one.

Beefy Hashbrown Potato Casserole

I forgot to take pictures of this one until after we’d finished eating. This was tasty, but my boyfriend, Kevin, and I decided that it needed something, like cheese. He’s thinking cream cheese and I’m thinking Velveeta.

Ingredients

1 pound ground beef

1 medium onion, chopped; about 1/2 cup (I didn’t include this)

1 10 3/4 ounces can condensed cream of mushroom soup (I used cream of chicken)

1 tablespoon ketchup

1 tablespoon Worcestershire sauce

3 cups frozen fried potato nuggets

Directions

Preheat oven to 425 degrees.

Cook beef and onion in a 10-inch skillet over medium-high heat until the beef is well browned, stirring to separate meat. Pour off the fat.

Stir the soup, ketchup, and Worcestershire in the skillet.

Spoon the beef mixture into a 2-quart shallow baking dish. Arrange the potatoes around the inside edge of the baking dish. (I coated the top of the beef mixture with the tater tots.

Bake for 25 minutes or until the potatoes are golden brown.

Source: http://www.campbellskitchen.com/recipes/recipedetails?recipeid=50382&fm=internal_search&sf10042417=1

Spicy Sausage Meatballs

This is the appetizer that I made for dinner tonight, the one that I shared before and after oven photos of. Now, they’re called “spicy,” but I didn’t include the spicy ingredients because two out of the four of us don’t do spicy foods.

These were super tasty, but slightly high maintenance. It takes a little while to make sure that the sausage mixture is well blended; I suggest using a larger bowl to have more room to do so.

Ingredients

1 pound Owens Hot Sausage (I used Mild Tennessee Pride sausage)

2 cups Bisquick

4 cups shredded cheddar cheese, Monterrey jack, or mixed

1/8 teaspoon salt

1/8 teaspoon pepper

1 tablespoon dried sage

1 tablespoon dreid parsley

2 tablespoons pickled jalapeno, chopped (I didn’t include this)

2 tablespoons water

Directions

Preheat oven to 375 degrees and spray 2 cookie sheets with non-stick cooking spray.

Put all ingredients in a large bowl and mix with your hands.

Form into 1 inch balls and place them on baking sheets, leaving some space between them so you can turn them over.

Bake 15 minutes and then turn them over. Bake an additional 15 minutes and transfer to serving dish. (This depends on how hot your oven gets; I cooked mine for 12 minutes, flipped them, and then cooked for another 12 minutes).

If you have leftovers, they are good reheated in the microwave.

Cheesy Chicken and Pasta Casserole

This was also super delicious! But my boyfriend said it had too much cheese, while I secretly thought that it could always use more cheese…

Ingredients


8oz medium pasta shells, uncooked

no-stick cooking spray

1 lb boneless, skinless chicken breast, cut into bite-size pieces

1/4 teaspoon garlic powder

3/4 cup chopped green bell pepper = 1 medium bell pepper (I didn’t include this)

1 14.5oz can diced tomatoes, undrained (I didn’t use this)

1 15oz can tomato sauce (since I didn’t use the above, I put extra sauce on the top of the casserole to make sure it wasn’t dry)

1 1/2 cups shredded Italian blend cheese, divided (I think it would be nice to use just a bag of mozzerela)

Directions


Preheat oven to 375 degrees.

Cook pasta according to package directions, omitting salt.

Meanwhile, spray 8×8” baking disk with cooking spray.

Spray large skillet with cooking spray; heat over medium-high heat. Add chicken and sprinkle with garlic powder. Cook 2-3 minutes and then add bell pepper. Cook until pepper is tender and chicken is no longer pink in centers.

Stir in undrained tomatoes, tomato sauce, 3/4 cup cheese, and cooked pasta.

Transfer mixture to prepared dish and sprinkle with remaining 3/4 cup cheese.

Bake 15 minutes or until cheese melts and mixture is bubbly.

Source: Walmart Meal Solutions magazine in the paper.